


Using Raspberry Pi for Mobile Proxies: A Comprehensive Guide
The Raspberry Pi has emerged as an incredibly versatile device, popular for various applications, including programming, media centers, and even as a web server. One of the lesser-known yet powerful uses of the Raspberry Pi is as a mobile proxy server. In this comprehensive guide, we will explore what mobile proxies are, how to set them up using a Raspberry Pi, their benefits, and best practices for use.
What is a Mobile Proxy?
A mobile proxy is a type of proxy server that routes your internet traffic through mobile devices rather than traditional servers. These proxies use mobile IP addresses, providing users with numerous advantages, including improved anonymity, better bypassing of geo-restrictions, and reduced chances of being blocked by websites. Mobile proxies are particularly useful for businesses engaged in web scraping, social media management, or any online task requiring the use of multiple IPs.
Why Use Raspberry Pi for Mobile Proxies?
Using a Raspberry Pi for mobile proxies presents several advantages:
- Cost-Effective: Raspberry Pi devices are affordable compared to traditional servers, making them an accessible option for individuals and small businesses.
- Portability: The compact size of a Raspberry Pi allows it to be easily transported and deployed in various locations.
- Energy Efficient: Raspberry Pi consumes very little power, which is ideal for long-term use and reduces operational costs.
- Customization: Users can easily customize and configure their Raspberry Pi to meet specific needs, such as installing various operating systems and software.
Setting Up Raspberry Pi as a Mobile Proxy
Setting up your Raspberry Pi as a mobile proxy involves several steps, including hardware preparation, software installation, and configuration. Below, we outline the key steps required to successfully establish a mobile proxy using your Raspberry Pi.
Step 1: Hardware Requirements
Before you start, ensure you have the following hardware:
- Raspberry Pi (any model with Wi-Fi capability is recommended)
- MicroSD card (8GB minimum)
- Power supply for Raspberry Pi
- Wi-Fi adapter (if your model doesn’t have built-in Wi-Fi)
- External mobile data connection (SIM card with mobile data plan)
Step 2: Install the Operating System
The next step is to install the operating system on your Raspberry Pi. The recommended OS is Raspberry Pi OS. Here’s how to do it:
- Download Raspberry Pi Imager from the official website.
- Insert the microSD card into your computer.
- Launch the Raspberry Pi Imager and choose the OS (select Raspberry Pi OS).
- Select your microSD card and click “Write.”
Step 3: Configure Network Settings
After installing the OS, set up the network connection:
- Connect your Raspberry Pi to a monitor, keyboard, and mouse.
- Boot up your Raspberry Pi and access the desktop.
- Navigate to the network settings and connect to your Wi-Fi or Ethernet.
Step 4: Install Proxy Software
You’ll need to install proxy software on your Raspberry Pi. One popular option is Squid. To install it, open the terminal and run the following commands:
sudo apt updatesudo apt install squidStep 5: Configure Squid
After installation, you need to configure Squid to function as a mobile proxy. This involves editing the Squid configuration file:
sudo nano /etc/squid/squid.confModify the configuration to allow access through your Raspberry Pi’s IP address:
http_access allow allIt’s essential to save your changes and restart the Squid service to apply the new settings:
sudo systemctl restart squidStep 6: Test Your Mobile Proxy
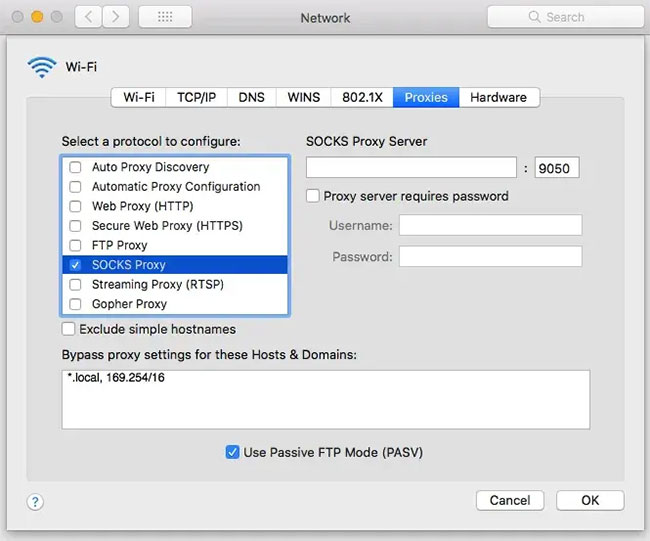
To ensure your proxy server is working correctly, you can use various tools or simply configure your browser or software to access the Raspberry Pi’s IP address and port (default is 3128) as a proxy server. Verify that your IP address is shown as the mobile address by accessing a site that shows your IP.
Best Practices for Using Raspberry Pi as a Mobile Proxy
Once you have everything set up, here are some best practices to enhance your experience with Raspberry Pi mobile proxies:
- Regular Updates: Keep your Raspberry Pi OS and Squid proxy software up to date for security and performance enhancements.
- Monitor Usage: Regularly check the logs generated by Squid to monitor usage, identify potential issues, and limit access as necessary.
- Secure Your Proxy: Implement security measures, such as authentication and access control lists (ACLs), to limit who can access your proxy server.
- Use Dynamic DNS: If you’re using a mobile connection, consider setting up Dynamic DNS to avoid issues with changing IP addresses.
Conclusion
Utilizing a Raspberry Pi as a mobile proxy server can provide significant benefits, including cost savings, improved privacy, and flexibility. With the right setup and maintenance, you can harness the power of Raspberry Pi to manage multiple mobile proxies efficiently. Whether for business or personal use, this guide serves as a solid foundation to get you started on your journey with Raspberry Pi mobile proxies.
For more detailed information and resources, visit the following link: Raspberry Pi for mobile proxies — what is this device? https://crazyfb.shop/en/page/malina-dlya-mobilnyh-proksi-chto-eto-za-ustroystvo